How to Clean a Coffee Maker, According to a Coffee Connoisseur

Who doesn’t look forward to that first morning brew? Rich, dark and deliciously hot, it’s what gets many of us going when we get out of bed. You may consider brewing coffee the highest priority item in your morning routine, but even investing in high-quality beans and a grinder won’t give you the experience you’re looking for if you rarely (or never!) clean your coffee maker. The cleanest coffee machine makes the best coffee, free from oily deposits and harmful buildup.
Unsure how to clean your coffee maker and how often? We consulted with Jason Cortellini, head of the Coffee Center of Excellence at Eight O’Clock Coffee for his expert opinion. And for more household cleaning tips, check out 25 Things You Should Clean Every Day and How to Do It.
Why it’s important to clean your coffee maker

You probably use your coffee maker every day, which leaves buildup that affects the taste. “Really cleaning the coffee pot between each use removes the bitter residue that coffee oil leaves behind—so the next batch you brew can taste just as good as the one before,” explains Cortellini.
And who doesn’t want that? Of course, by servicing it regularly, you’ll also keep your coffee maker running in top condition, extending the life of the machine, and giving you more bang for your buck. Regular maintenance—especially the monthly deep-cleaning technique we’ll share with you below—can help minimize the growth of unwanted germs, mold, and yeast.
Daily maintenance for your coffee maker
A little bit of simple daily upkeep is all it takes to keep your coffee machine churning out its best possible brew, according to Cortellini. Here’s what you need to to:
Step 1: Empty the coffee maker.
Pour any unused coffee out of the carafe and dump the spent coffee grounds along with the filter (if you’re using one).
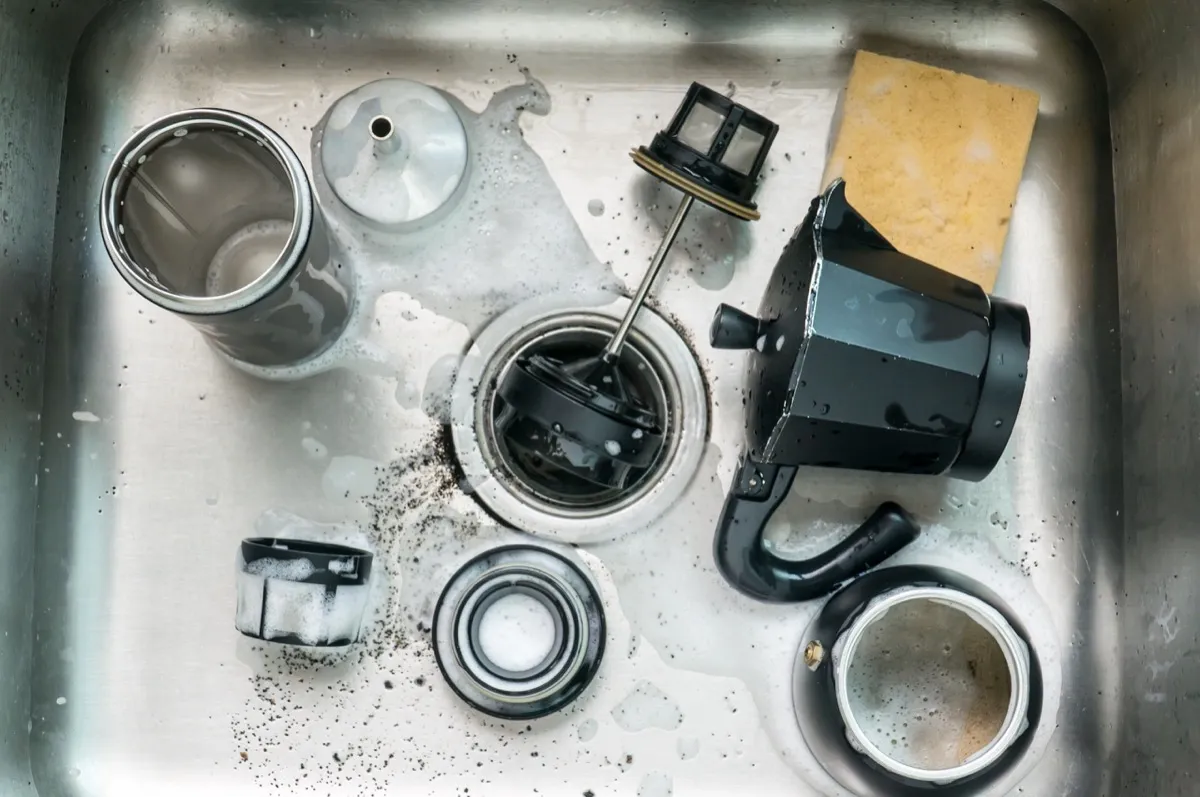
Step 2: Wash all removable parts.
It may seem like overkill, but you should wash all removable parts of your coffee machine with dish soap after every use. This includes the carafe, the lid, the removable basket and anything else that easily comes off. Hand wash with warm and soapy water. Pieces that are dishwasher safe can be placed in the top rack of your dishwasher.
Step 3: Wipe it down.
Wipe down the outside of the machine and the warming plate in order to remove any coffee that may have spilled during the brewing process.
Step 4: Let the reservoir dry.
Leave the lid of the water reservoir open when not in use to let it completely dry out between brews. Doing this cuts down on the growth of potentially harmful bacteria.
Monthly maintenance for your coffee maker

As with just about anything, an occasional deep cleaning can really benefit your coffee maker. Every month, follow the below instructions from Cortellini to service hard-to-reach areas, flushing out deposits and debris that build up over time. (If you have an espresso machine or a machine that uses single serving pods, follow the manufacturer’s cleaning instructions.)
Step 1: Fill the reservoir
After dumping out any coffee, grounds, and used filters, till the water reservoir with equal parts white distilled vinegar and water.
Step 2: Position a filter.
Place a paper filter in the empty basket where you would normally put your coffee grounds.
Step 3: Brew.
Place the pot on the warming plate and brew the vinegar and water solution, filling the pot about halfway.
Step 4: Let it sit.
Turn the machine off and wait 30 minutes.
Step 5: Finish brewing the rest.
Turn the machine on and finish brewing the vinegar and water mixture.
Step 6: Dump out the vinegar and water.
After the cycle has finished brewing, dump the mixture out.
Step 7: Run the coffee maker again.
Fill the water reservoir with clean water and run another entire cycle. This flushes the vinegar out completely so you’re not left with a tangy taste to your coffee. You may find that you need to brew a water-only cycle twice to completely remove the vinegar (a sniff test comes in handy here: when you’re no longer smelling vinegar, it’s probably safe to stop).
Step 8: Wash the rest of the machine.
Follow this process by washing all removable parts, just like you would after daily use, and leave the lid of the water reservoir up to allow the machine to dry out completely before you make your next cup.