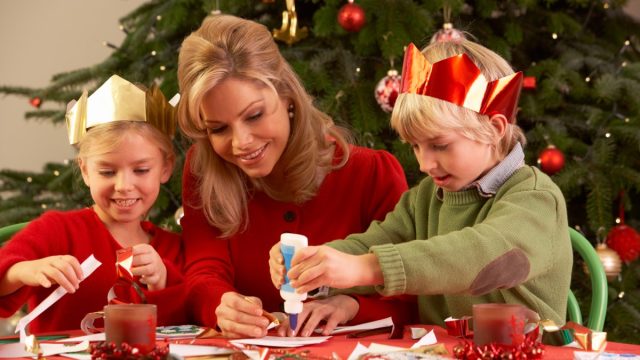
You don't need to break the bank if you want to transform your home into the envy-inducing winter wonderland you've always dreamed of. In fact, with these incredibly easy and cost-effective DIY tips below, you'll find that you'll not only impress your spouse and children (and in-laws!), but you'll also be the star Instagram attraction on your block. So read on, and spend all of the money you saved on gifts for the ones you love! And remember: however you decide to deck your halls, This Is the Date When You Should Take Down Your Christmas Decorations.
1
Ice lanterns
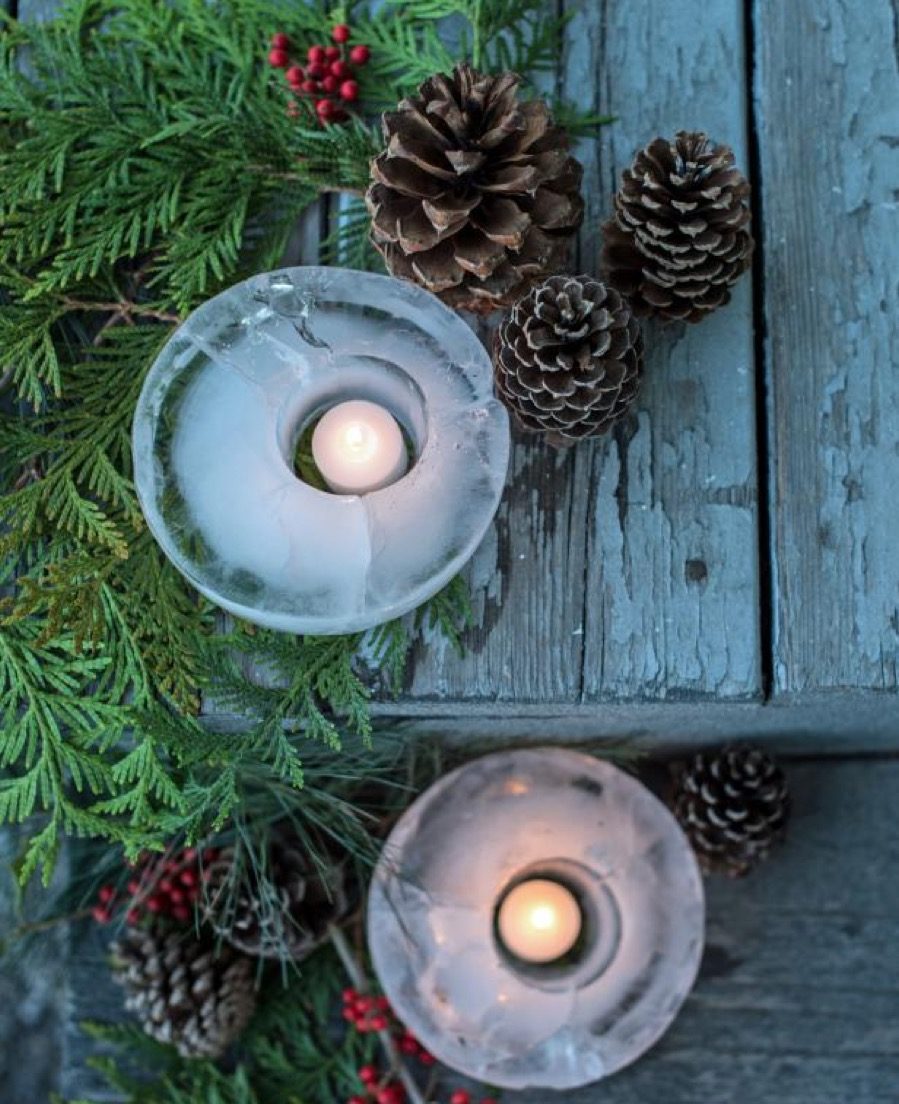
For decorators seeking an easy and cheap alternative to outdoor holiday decorations, look no further than these DIY ice lanterns. To make these small ice sculptures, simply fill a medium to large plastic container with water, and then submerge a plastic cup in the middle of the container to create the space for the tea light. After leaving it in your freezer overnight (or outdoors, if the temperatures are cold enough), take out the frozen mold to discover a perfectly-shaped ice lantern.
As long as the temperatures outside allow for the existence of such lanterns, you can either place them on your front porch or along the stairs leading to your front door to truly amaze any guests this holiday season. To complete the look, affix tea lights in the center of the lantern, and add touches of evergreen branches and pinecones for a truly masterful outdoor centerpiece. And for more ways to avoid turning your home into a series of unfortunate decor mistakes, check out these 20 Common Decorating Tips You Should Always Ignore.
2
Shiny and bright wreath
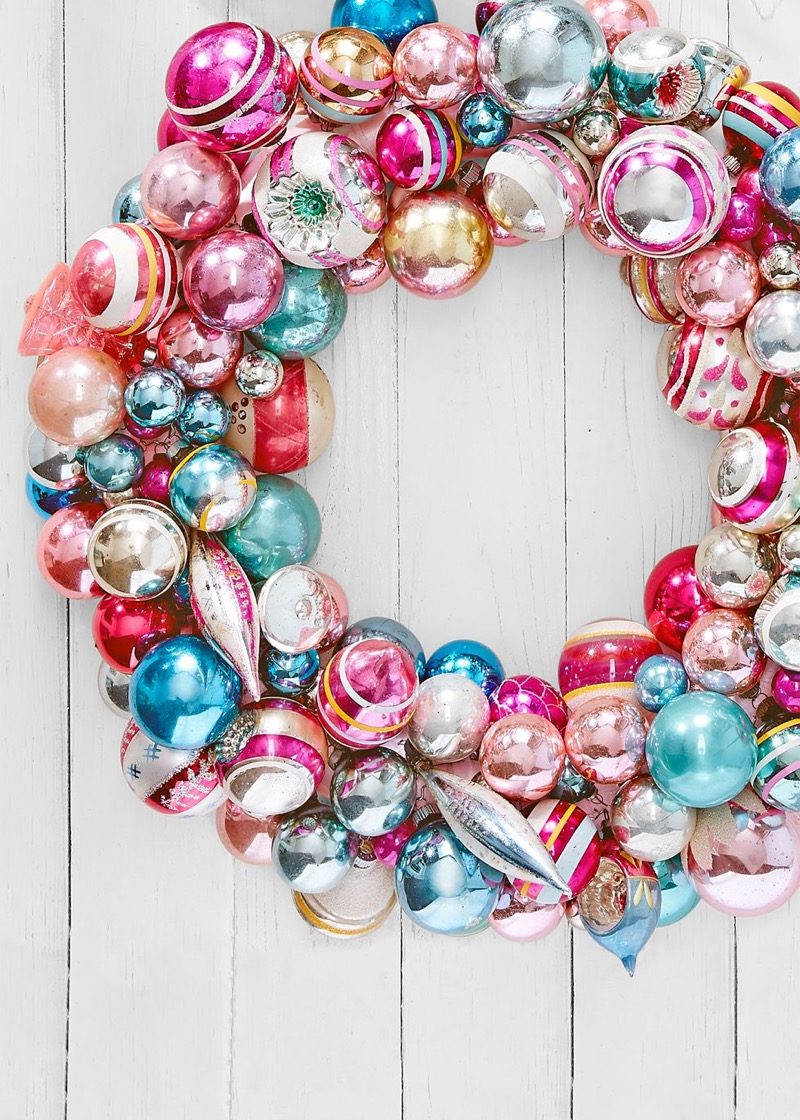
If your collection of ornaments has truly gotten out of hand, take the shiniest and brightest out of the rejected batch to make this repurposed wreath. As a base, use a simple styrofoam wreath wrapped with ribbon. Then, using green pins (stick with the Christmas theme!), attach your favorite unused ornaments to the wreath until you've entirely covered the base. If you end up making more than one, use them to add a decorative twist to your fenceposts or veranda.
3
Gold-dipped bottle brush trees
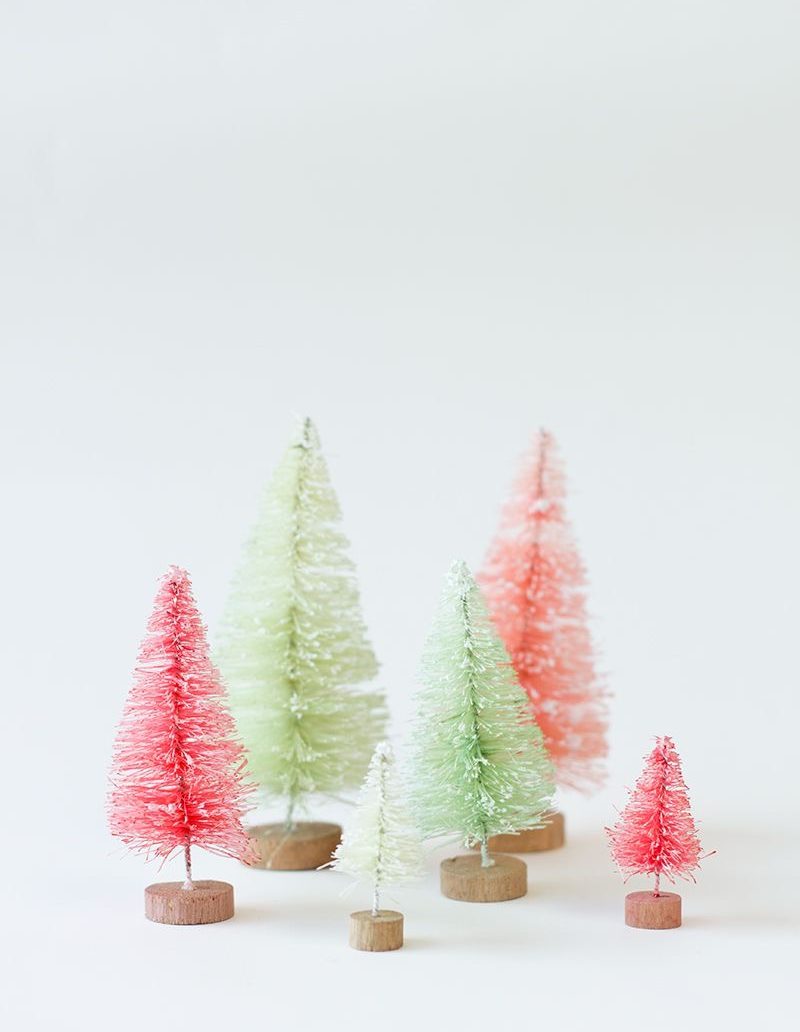
If your mantle is severely lacking in the holiday decoration department, fill in the extra spaces with cheer via these gold-dipped bottle brush trees. To craft these miniature trees, use food coloring to dye white bottle brush trees any color you wish. After the trees have thoroughly dried, use gold-colored nail polish to paint the tips of the trees in order to give them the "gold-dipped" look. To complete this gold-inspired holiday decorating theme, add gold confetti to the surrounding space on your mantle. And for more ways to save on home decor every other day of the year, check out these 23 Amazing Home Decor Items You Won't Believe Are From Walmart.
4
Gift wrap serving plates
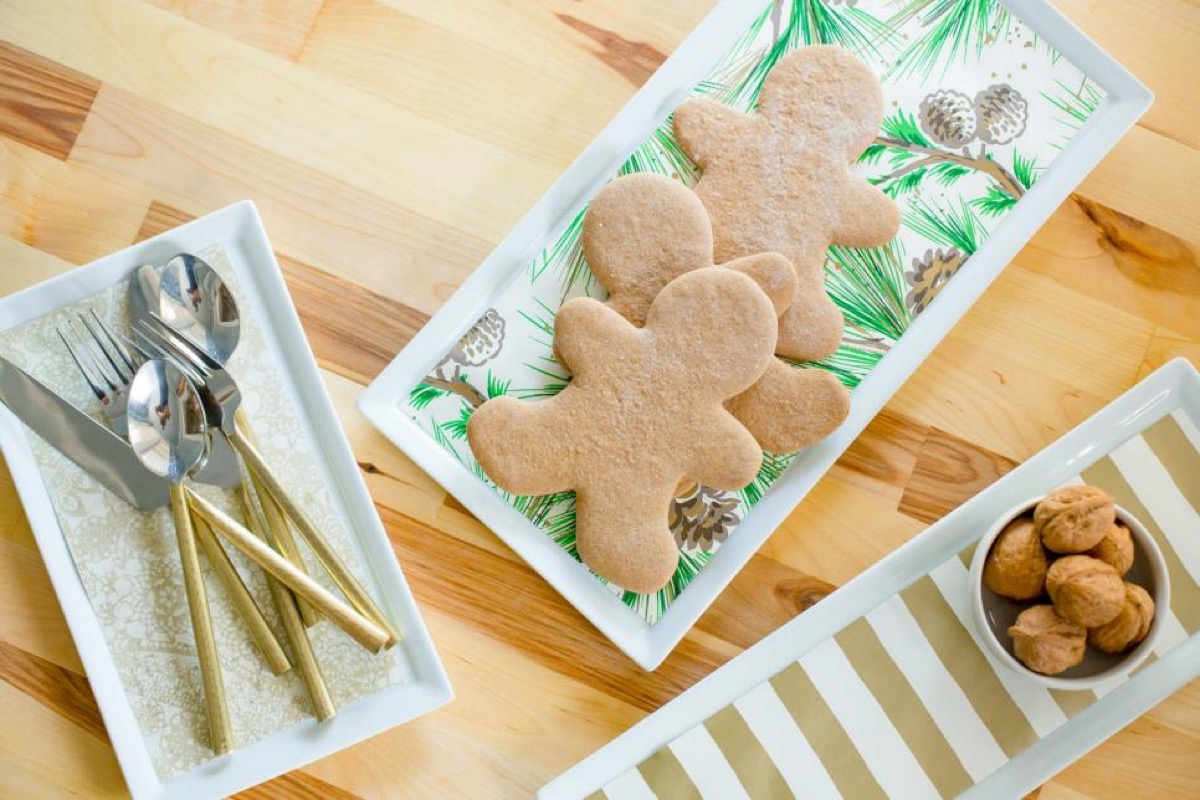
To cover all of your bases, why not make every serving dish fit into the holiday decor? To complete this festive look, simply grab a few different roles of wrapper paper and measure out the length required to line each serving tray. More than anything, it's an incredibly easy and cost-effective way to make sure that all of your party accessories are up to snuff.
5
Gingerbread village
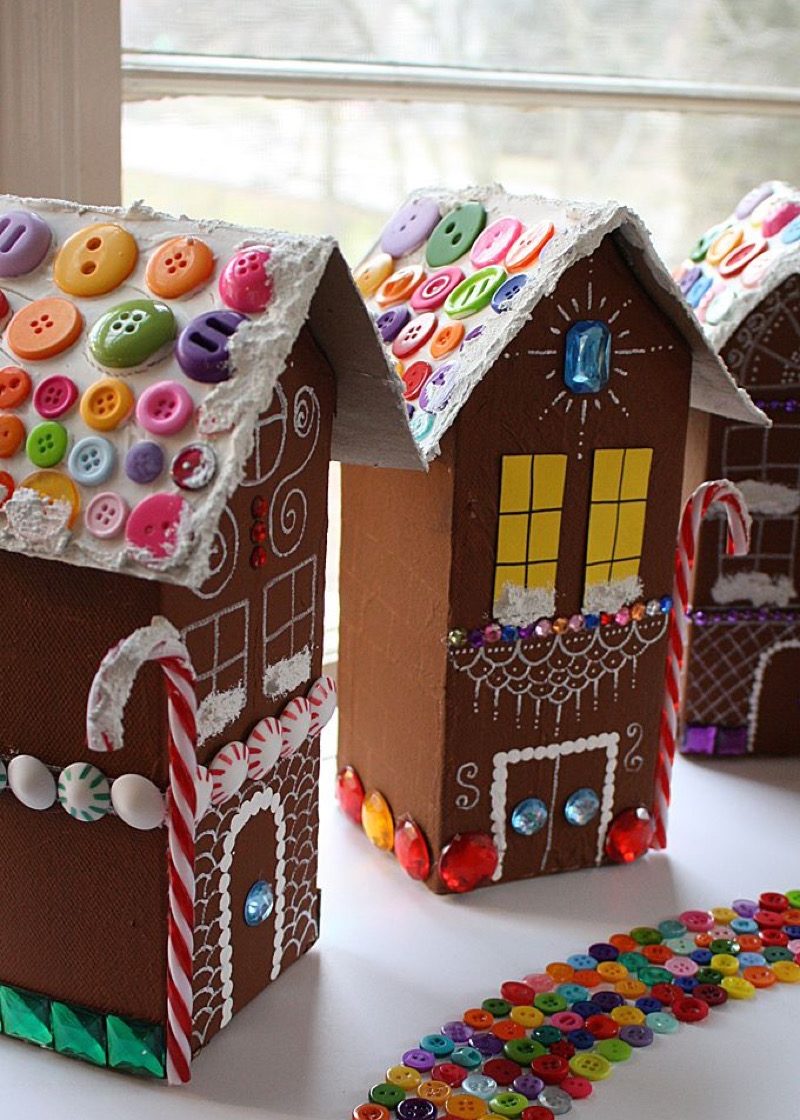
Instead of spending a fortune on culinary materials for a gingerbread village, why not create one from recycled milk cartons, napkins, cereal boxes, and old buttons? The only items you may need to purchase are: light brown and white acrylic craft paint, SnowTex, a white paint pen, faux candy canes, beads, decoupage medium, and yellow cardstock—all of which you can easily find at your local craft store.
To begin, open the cartons at the "pour" side and cut the upper corner triangles out of the carton, leaving a little border around the "pouring" triangle. Hot-glue these sides together to create the eaves of your gingerbread houses. After that, paint a thin layer of decoupage and napkins on to the cartons. Once this layer has dried, add another—and eventually, after that layer has also dried, paint each of the houses light brown.
Then, using cardboard from old cereal boxes, cut and shape them to form the roofs, which you'll then paint white and glue to the housetops. Once you've completed the main tasks, you can get creative. Start by incorporating any craft materials that you may have on hand. (Easy addendum: Buttons! Surely you have a million hidden around.) And if you need yet another reason to put out your decorations as soon as possible, Science Says Putting Your Holiday Decorations Up Earlier Will Make You Happy.
6
Fake roaring fireplace
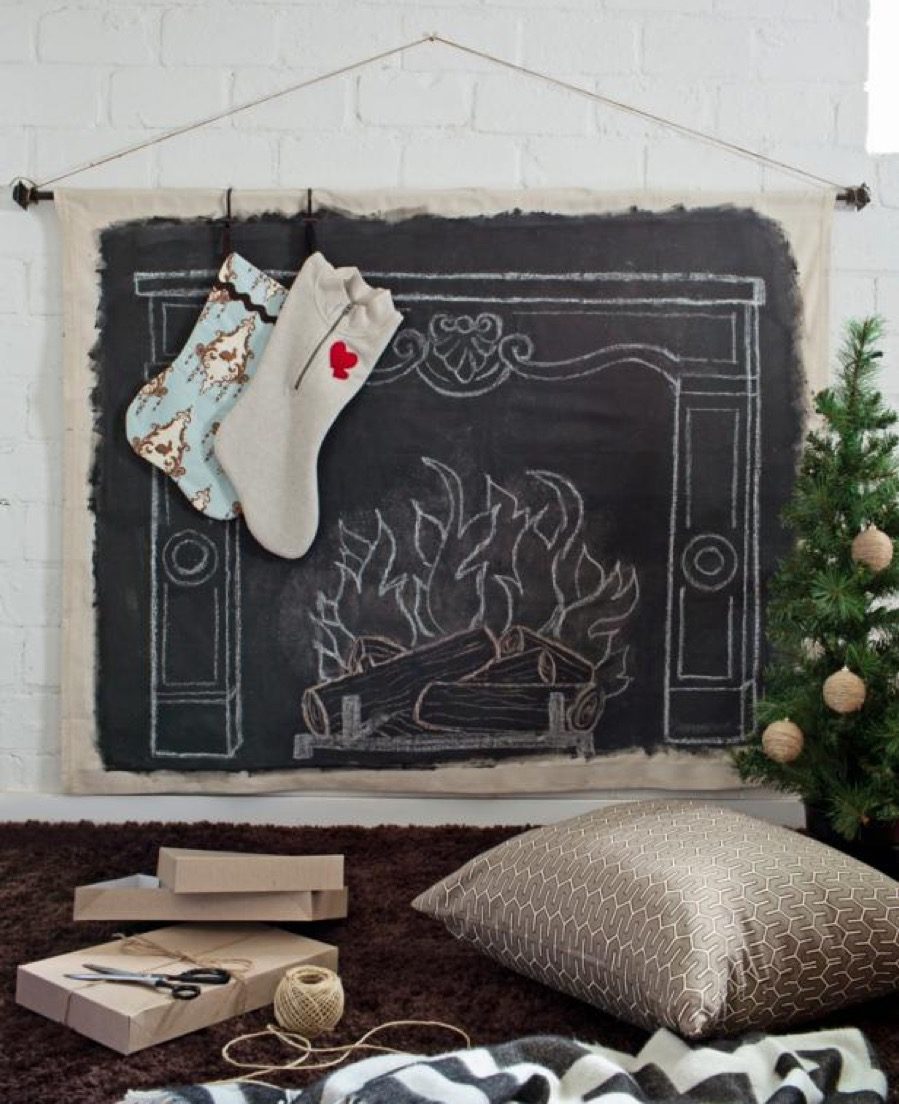
Even if your home is missing that quintessential roaring fireplace, you can now create your own cozy wintertime escape by using a canvas drop cloth, chalk paint, and chalk to draw your very own fireplace on to a wall. To do so, simply prepare the canvas by using chalk paint, which enables you to create this scene with chalk. Then, simply drive a nail into the wall of your choice and hang the drapery with a curtain rod and twine—and ta-da! Your winter wonderland is now complete.
7
Wooden banner
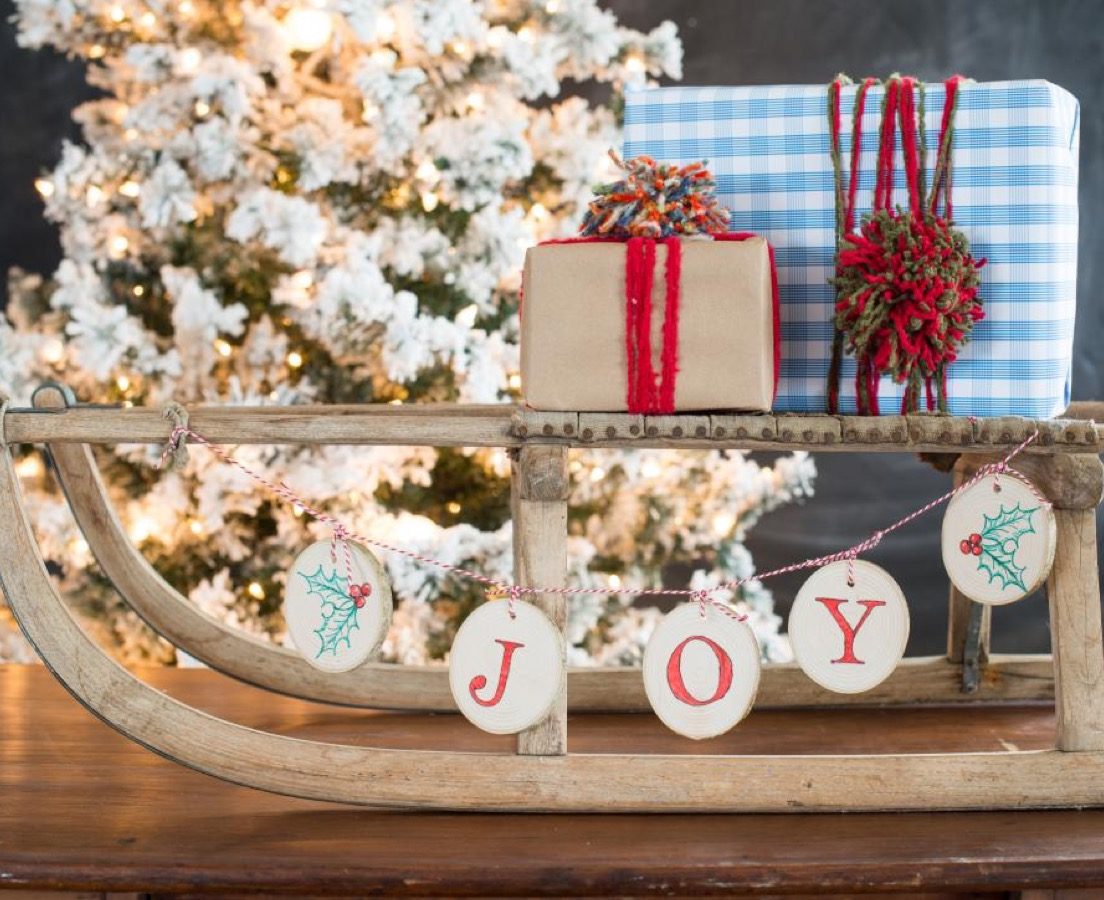
If you're looking for rustic appeal, this DIY wooden banner can instantly bring a vintage, woodsy feel into your home. Recreate this look by using five round pieces of wood, approximately two to three inches in diameter, which can be easily found at any crafts store—or even outside in your log pile! After using a 1/8" drill bit to drill holes into the top of the wood to make room for the colorful baker's twine, use stencil paper and red and green permanent markers to etch your favorite holiday saying on to the pieces of wood. Once you've assembled this festive garland, hang it in an area of your home in need of a little decoration—such as a banister or doorway.
8
Advent calendar with mittens
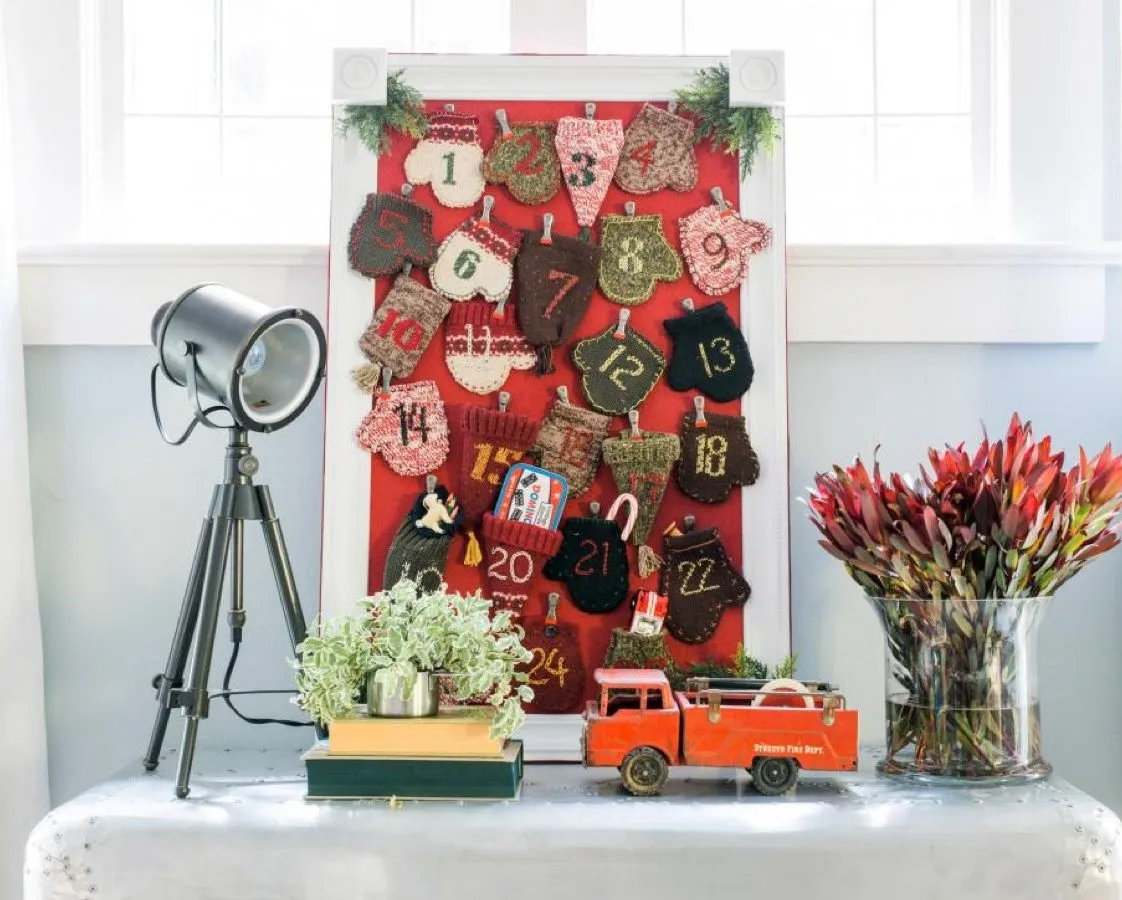
Give the typical advent calendar a more personal touch by repurposing old sweaters to create these miniature mittens embedded with the days of December leading up until Christmas Day. To make these mittens, first, use pieces of paper to trace the circumference of each mitten and its accompanying day of the month. From there, use a tapestry needle and colorful thread to stitch the numbers on to the mittens. In this process, be sure that each mitten has two sides, so as to create pockets for small pieces of candy and trinkets. Finally, proudly display your creations by pinning them onto a large picture frame or chalkboard.
9
Sparkling votives
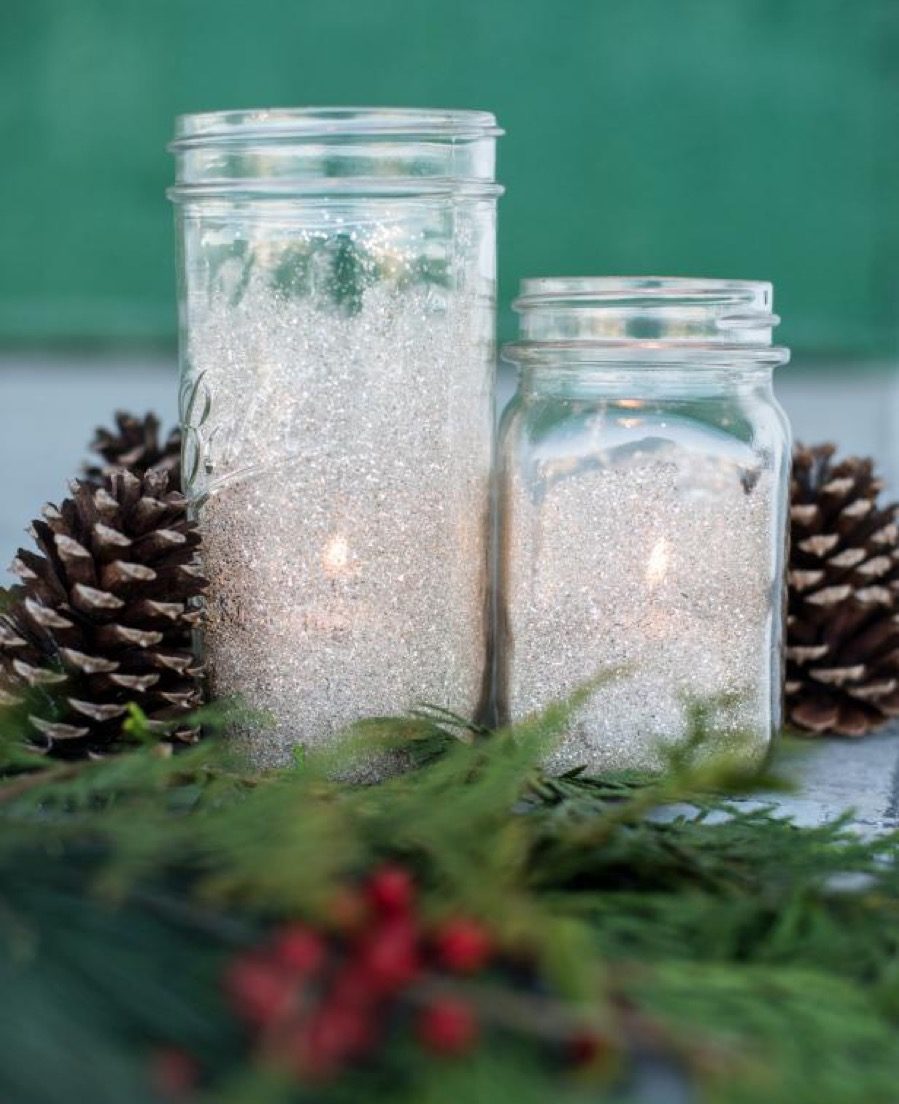
If you're looking for a last-minute way to decorate your home for a holiday-related party, these sparkling votives might just trick your guests into believing that you dropped quite a bit of money at your local Crate & Barrel. Indulge in this ambiance by applying glue to the inside of a mason jar, and then using a spoon to artfully distribute the glitter. When you're ready, place tea lights or small candles inside of the jar to create the sparking effect.
10
Wrapping-paper Christmas tree
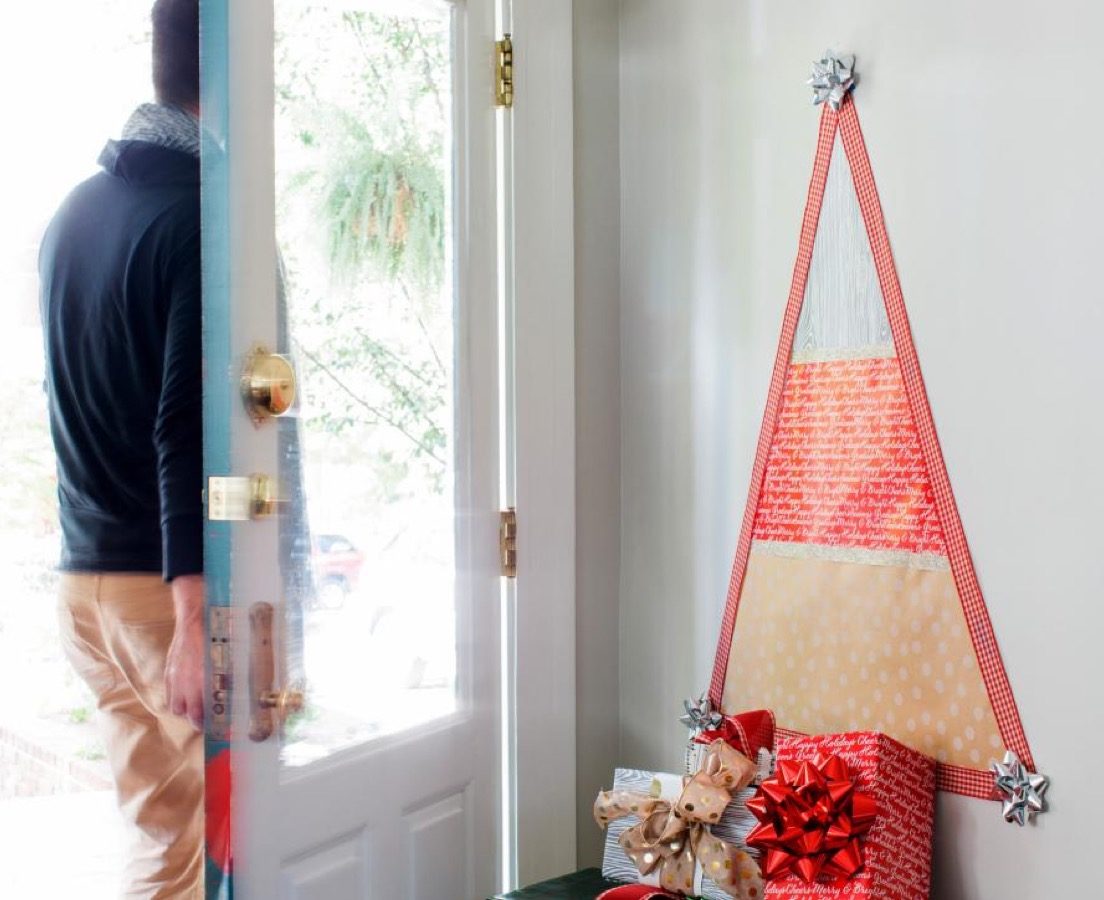
If there's one thing that always seems to go to waste every holiday season, it's those endless rolls of wrapper paper. Make any dimly lit entry way more inviting by putting all that unused paper to create a totally unique Christmas tree. After tracing three different wrapping paper patterns, stack them on top of each other by using double-sided tape and ribbon to give the tree polished edges. Then, simply add bows to each corner (and a few presents underneath the tree!) to give it the full effect.
11
Evergreen wreath snowman
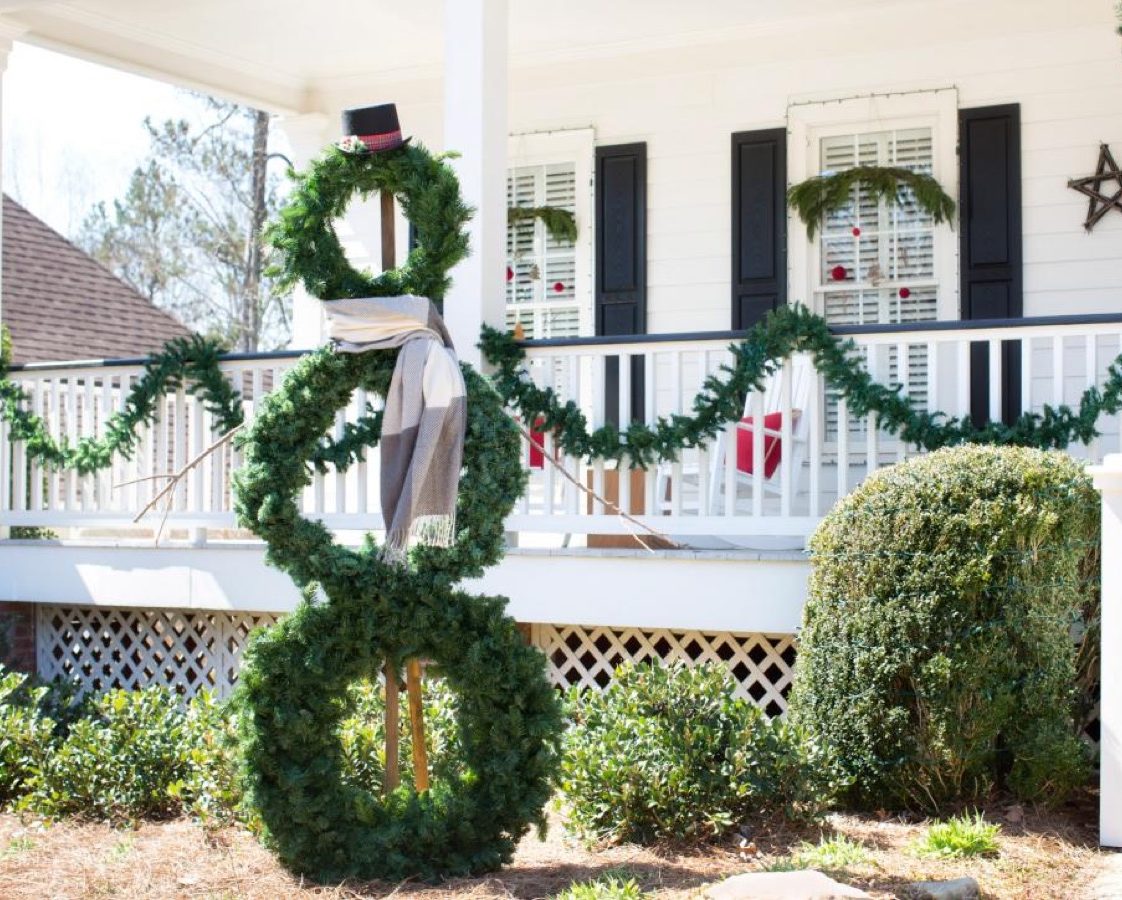
To create a decoration that will last for many future holidays to come, stake a large wooden pole, about seven feet in length, into the ground. To make sure that the pole is sturdy enough to support the evergreen snowman, create a supporting beam out of wood and secure it into the pole with a nail. Next, decide where the three faux evergreen wreaths in ascending size will go—after deciding this, use 1/2" exterior wood screws and galvanized wire wrapped around the wooden post to secure the wreaths into place. And finally, add whatever holiday touches you feel are necessary to complete the snowman's look—like a top hat and scarf.
12
Felt tree skirt
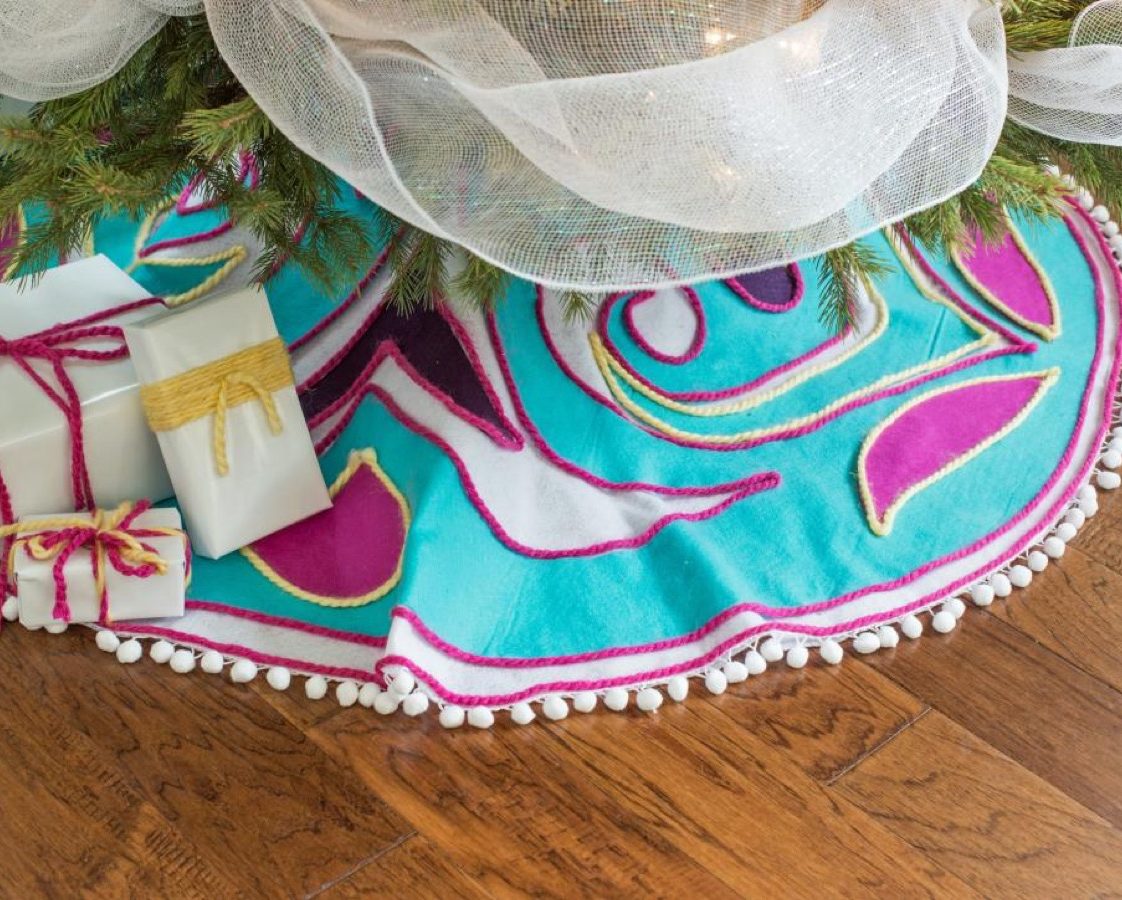
Rather than using that dusty old heirloom tree skirt, test your creative skills by crafting this colorful felt tree skirt, which requires zero sewing. Start by gathering about one-and-a-half yards each of white, turquoise, and two to three complementary colors of felt material. After cutting a 48" square out of the white felt fabric, fold the square in half twice, tie a piece of string around a pencil in order to artfully trace a circular shape necessary to create the hole in which the tree would fit.
Then, using the white skirt as a template, cut the turquoise felt into a 48" circle—and then fold that fabric into quarters. After start, create a large, easy design with chalk; draw it right on the felt. Similar to a paper snowflake, cutting out the design will result in a symmetrical design, which you should then place over the white felt. Now, using the chalk again, create some more symmetrical patterns, and layer the complementary colors on the white and turquoise felt. Once the design is complete, glue all of the pieces together.
To add a decorative border like the one shown above, apply fabric glue to the outer edges of the skirt and the felt pieces. Then, create cohesive borders using a chunky yarn in a complimentary color of your choice. Finally, glue on any added embellishment (pom poms!) for an added effect.
13
Wooden menorah
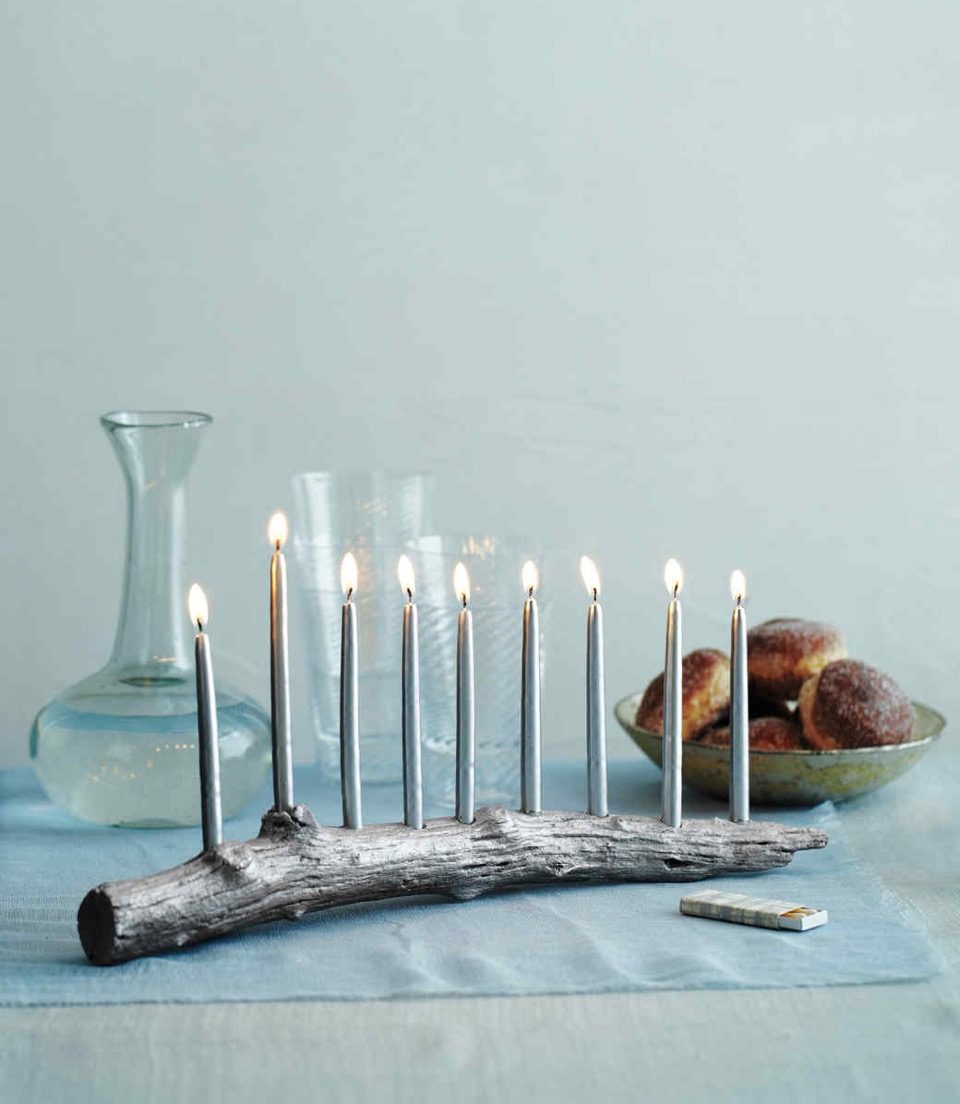
Celebrate Hanukkah in the most fashionable possible by creating this earthy menorah. If your location allows, venture outside and find a branch, at least 16 inches long that contains a raised knot (used to place the shams, or the candle used to light the other candles). Once you've found the perfect branch, mark nine evenly spaced dots (including the raised knot) with a pencil and drill holes into the dots with a 3/8-inch bit. Then, using silver craft paint, decorate the branch just enough to smooth over the rough edges of the wood. After the paint is dry, affix self-adhesive bumpers to the bottom of the branch for it to remain stable. And for more on these eight crazy nights, here are 15 Reasons Why Hanukkah Is the Most Underrated Holiday Ever.
14
Snowflake wine bottles
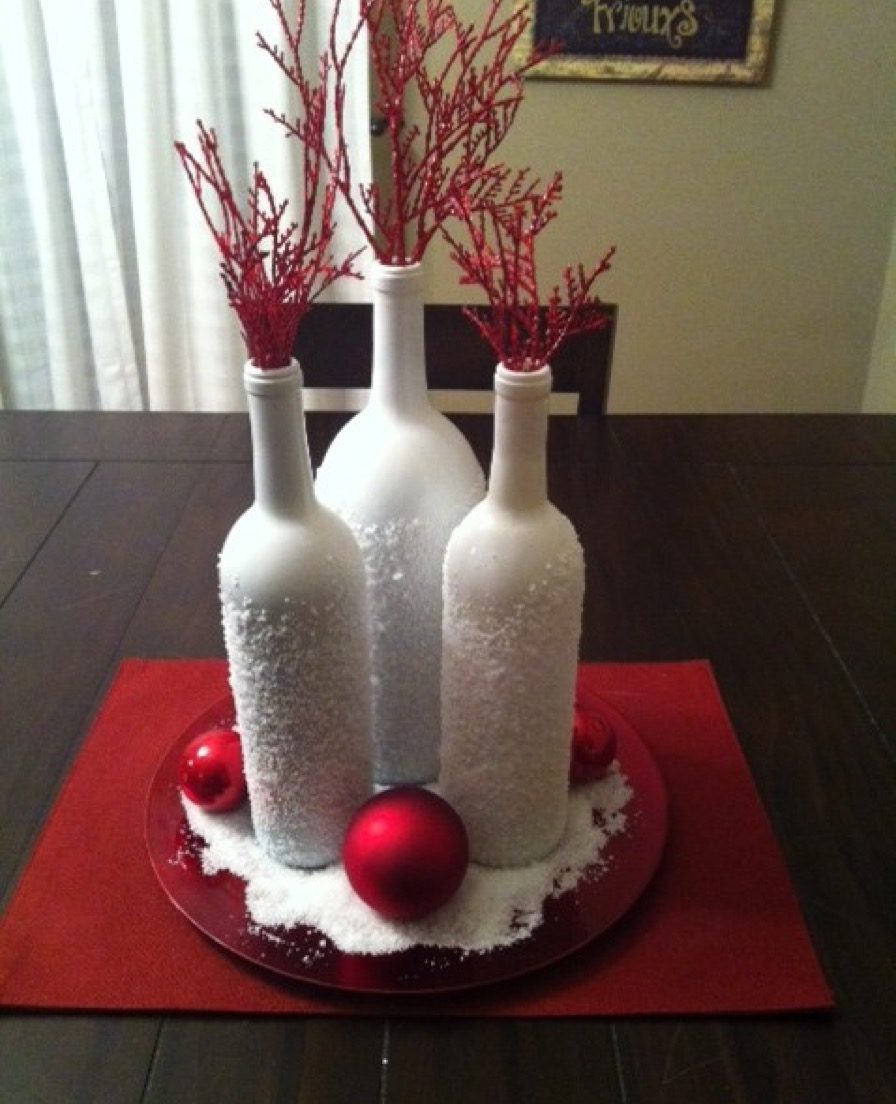
Put your old wine bottles to use this holiday season by making them a centerpiece for your dining room table or mantle. To recreate this look, simply remove the labels from the bottles of three wine bottles varying in size, and then use white paint, glue, and fake snow from any craft store to decorate their exteriors. Place all three wine bottles, along with a few red ornaments and fake snow, on a red or green-colored decorative plate to truly pack a punch this holiday season.
15
Fish bowl snowman
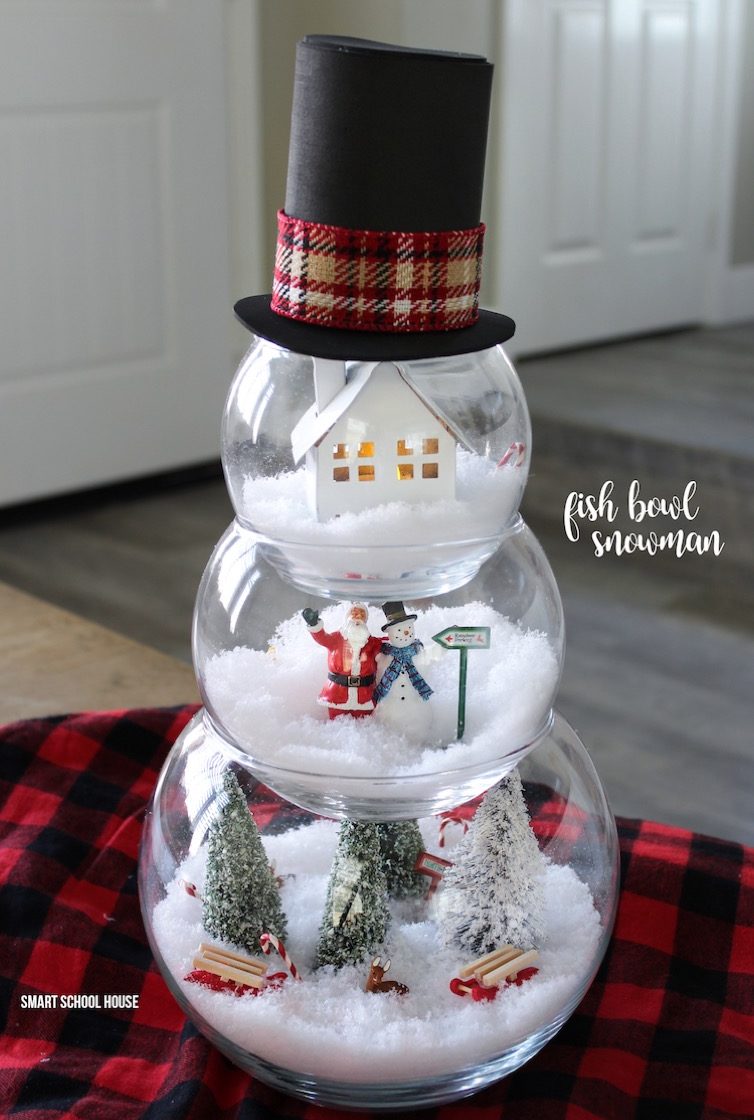
For those tight on time but loose on creativity, this project is perfect for you. After placing a small amount of fake snow at the bottom of each fish bowl (which you can find at pretty much every craft store), arrange the various snow village pieces (also available at most craft stores) to create a special moment in each bowl. Then, carefully stack the fish bowls on top of another, adding glue to the precarious points that may require it (though they should stay in place).
To create the hat on top of the snowman, trace a circle into black foam fabric that is slightly larger than your smallest fish bowl, and, to create the length in the hat, cut a rectangle from the fabric to roll into a cylinder. Then, use a hot glue gun to secure the edges of the hat together, and then a ribbon to top it off.
16
Paper light garland
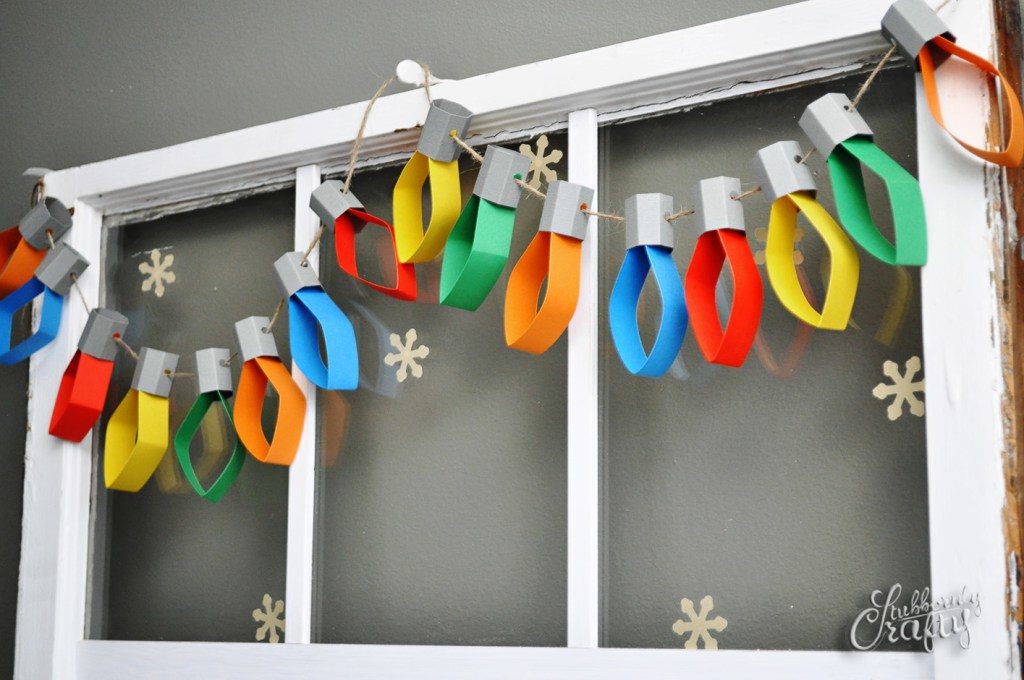
If you'd rather not work to untangle that string of lights this holiday season, simply create your own version using a veritable rainbow of differently colored card stock, a bunch of gray card stock, glue, a hole punch, a scoring blade, and twine, ribbon, or yarn.
Depending on the number of paper lights you desire, use a ruler to measure out two groups of strips of paper: one at four inches by one inch (use the gray stock for this), and one at eight inches by 3/4 inch. After making sure that you've prepared an equal number of both set, take the gray four-inch strips and fold them in half three times. Since these will be the top pieces in which the twine will be inserted, laying the strip completely flat, cut a hole on the third rectangle from the left. This will provide a place for the twine to go.
After gluing the ends together, move on to the other set of strips. Told them in half and punch a hole through the top, where the ends of the paper strip meet. Once you've ensured that every strip of paper resembles a light, insert them into the other strips of circular paper, and secure the twine through both sets of holes. if you're satisfied with the finished product, string up your whimsical lights from any fireplace, cabinet, or doorway in need of some colorful decoration.
17
Stacked gifts centerpiece
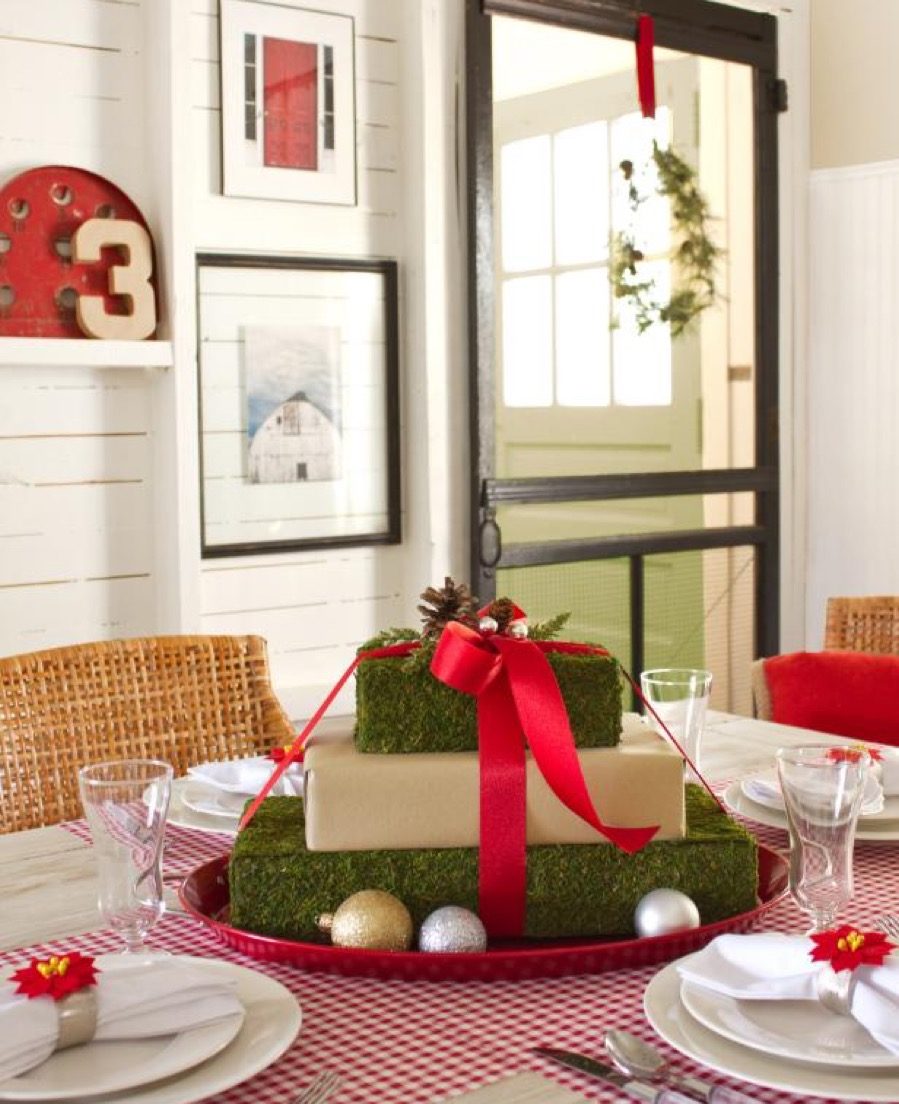
If your holiday table is missing that magical centerpiece sure to ring in the cheer, set aside a few minutes to create this simple and earthy stacked gifts centerpiece. Simply wrap three foam bricks of varying sizes in Kraft paper and sheet moss, stack them on top of one another, and glue together. For the finishing touch, wrap a red ribbon around the gift box ensemble, place it on a decorative serving tray, and adorn with whatever you might have laying around—like extra ornaments and small Christmas decorations.
18
Personalized place cards
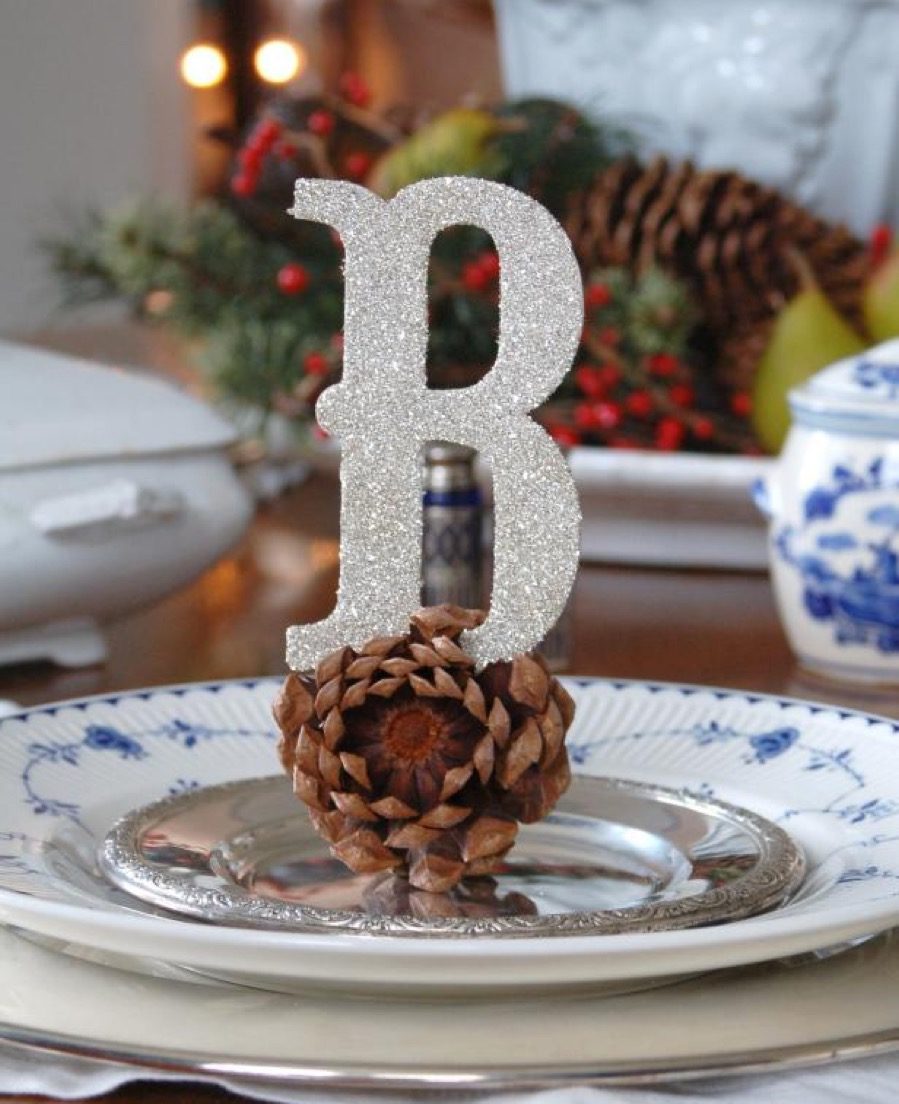
Instead of sticking with the same paper place cards (or even worse—having no place cards at all), take a few minutes out of your busy holiday schedule to craft these whimsical place cards. You'll need to grab a pinecone, artist brush, and a traditional chipboard letter (one for each of your guests, assuming that you'll pick the first letter of their first name to identify them by).
Then, simply use the artist brush to apply normal Elmer's glue to both sides of each letter, and then sprinkle glitter glue on both sides until they are fully covered. Finally, root the letters into the pinecones—and you now have truly stylish place cards that will blow away your family and friends at the next holiday gathering.
19
Sweater stockings
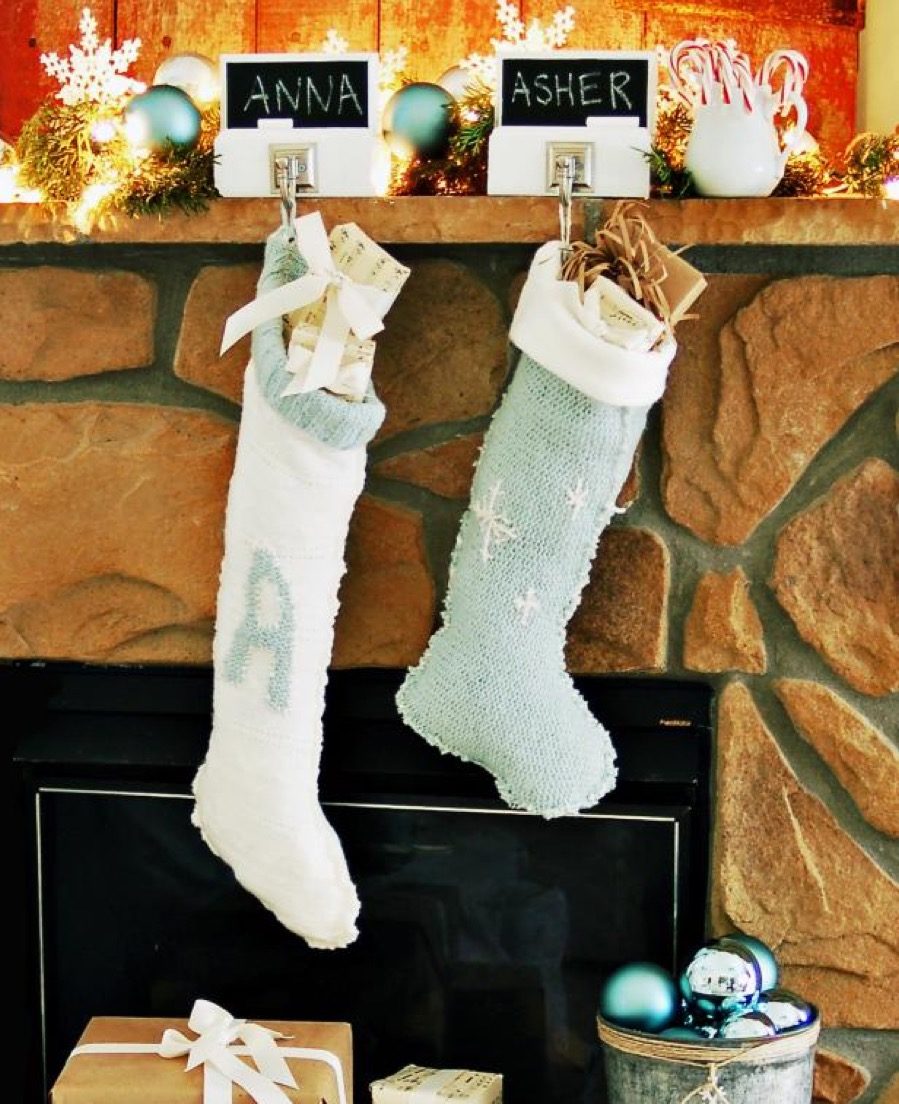
If you're tired of hanging up the same old stockings year after year, look to the old sweaters in the back of your closet for design inspiration. No matter how many stockings you'll need to hang by the fireplace this year, crafting new ones out of old sweaters will only require one afternoon of crafting. (Keep in mind, however, that this project does require the use of one old sweater per stocking, so be sure that you have enough material before embarking on this venture.) Aside from the sweaters, you'll need fuzzy yarn in a color of your choosing, an upholstery needle, and sharp scissors.
Before creating the stockings, print out a template for the stocking that you will then pin to each sweater. Then, using the scissors, cut both the front and back of the sweater, along the lines of the stocking template. After doing that, stitch together the front and back portions of the sweater to create the stocking, using the upholstery needle and fuzzy yarn. Depending on which embellishments you would like to add to the stocking, you can follow this more in-depth guide to determine how to go about creating letters and snowflakes.
20
Shell trees
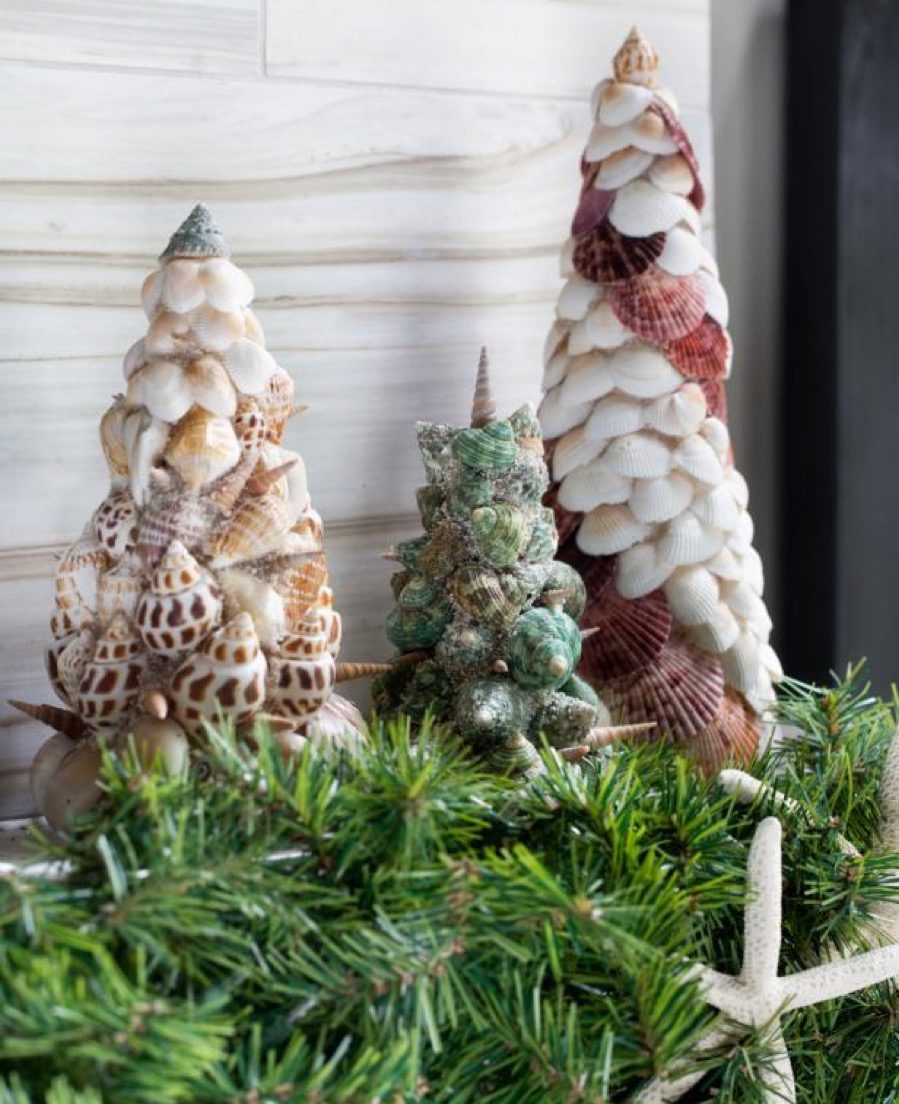
This beach-inspired take on the Christmas tree can provide the perfect way to instill wintry holiday spirit in a warming climate. Start by using shells from your local craft store, rather than using the shells captured in your latest beach venture, may prove to be more conducive, as you can more easily create the patterns depicted in the example above. Either way, be sure to grab shells in assorted sizes and colors, in order to create the aforementioned patterns. Using a simple base made of foam, start from the bottom and work your way up the tree, gluing shells on the base in patterns of your choosing. This project is a great endeavor for those looking for a little more DIY independence.
21
Takeout box advent calendar
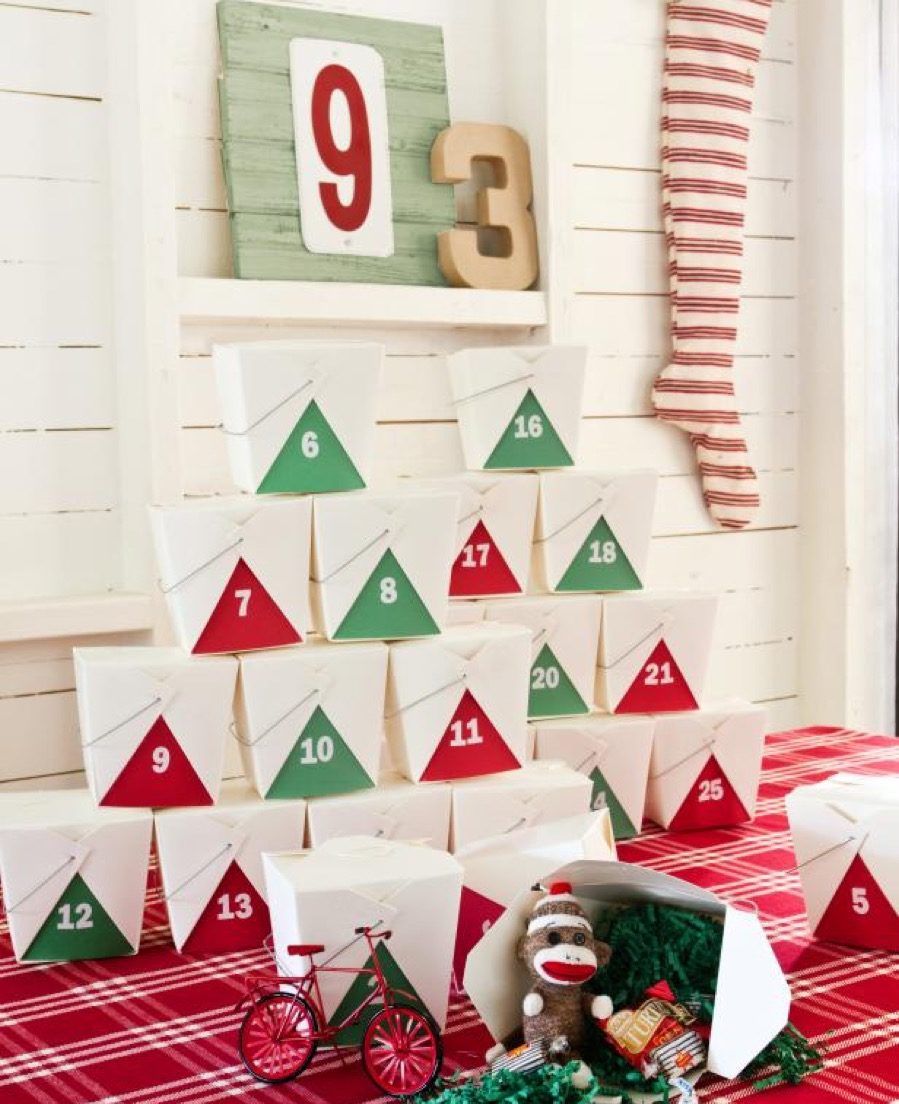
Finally, there's a purpose for all of those takeout boxes that never seem to make their way to the garbage—this adorable takeout box advent calendar! For this project, you'll need 25 white takeout boxes (so be sure to save start saving them now), red and green construction paper, white number stickers, and crinkle cut paper filler.
First, use a ruler to measure the width of the bottom of the box and the length of the box from the metal handle down. Then, using these measurements, cut 12 squares of red construction paper and 13 squares of the green construction paper. After placing these squares in the takeout boxes, secure each of them with double-sided tape, and then use the white number stickers to number each box. Start with the red box, and alternate between the two colors until you mark day 25 on a red box. After you've added the final touches, the takeout boxes will provide a clever way to hide the gifts fro your loved ones.
22
Retro-inspired tree topper
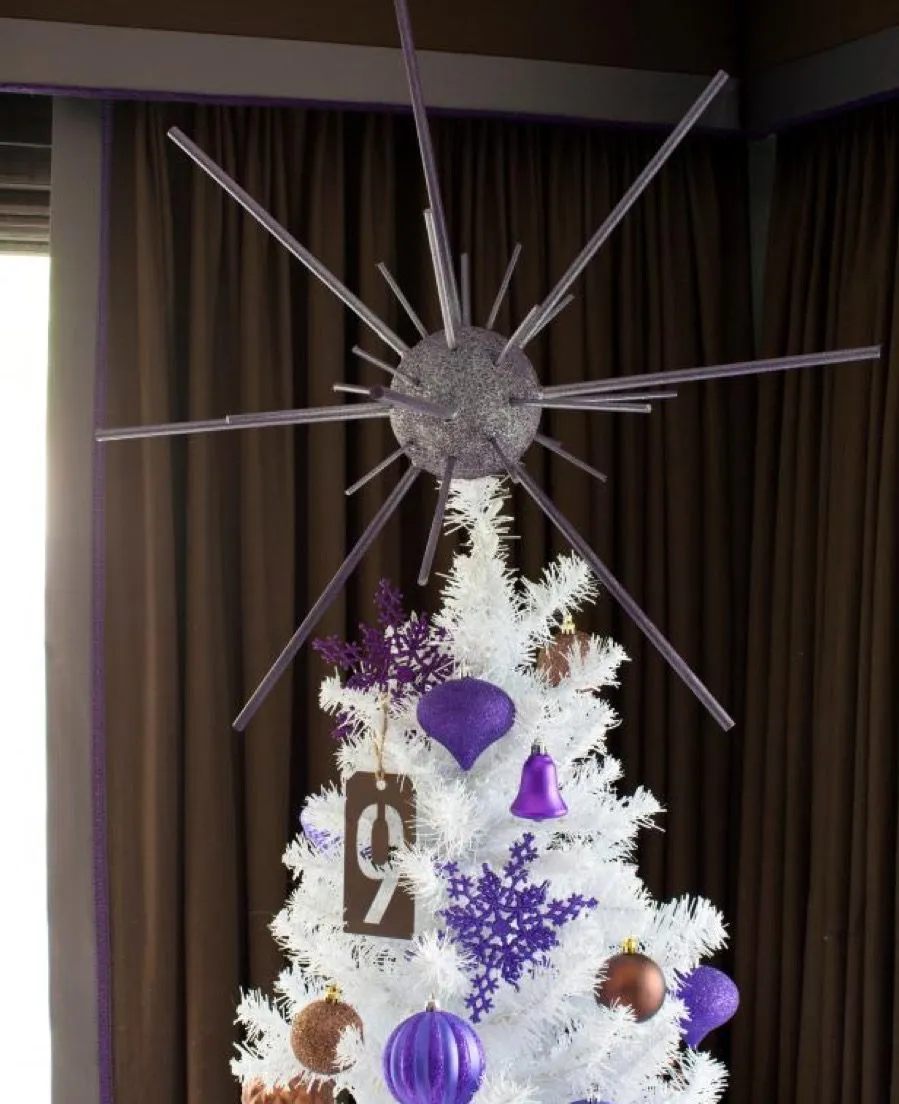
It's no secret that trends from the '60s have come back in a big way recently. So, if you're on board with this emphasis on all things modern and space-age chic, creating this retro-inspired tree topper can carry some of this style over into your holiday decor. (Though, be warned: it's a bit time-intensive, so be prepared to spend a few hours crafting this show stopper.) To get started, you'll need the following items:
- 6" foam floral sphere
- 9 wooden dowels sized 3/8"
- 8 wooden dowels sized 1/4"
- 12 wooden dowels sized 3/16"
- small handsaw with a miter box
- hot glue gun and glue sticks
- pen or marker
- roll of Kraft paper
- tape measure
- spray paint
- glitter spray paint
After you've rounded up these items, use your tape measure and marker each 3/8" thickness dowel at 12 inches in length, 1/4" wooden dowel at six inches in length, and 3/16" dowel at four inches in length. Then, using the handsaw, place each wooden dowel inside the miter box and cut them at the marked indicators. Then, after spray painting the wooden dowels with your desired color, insert them into the foam sphere. After this step is complete, spray paint the foam sphere with the same color, for an added level of cohesion.
23
Yarn-wrapped pinecones
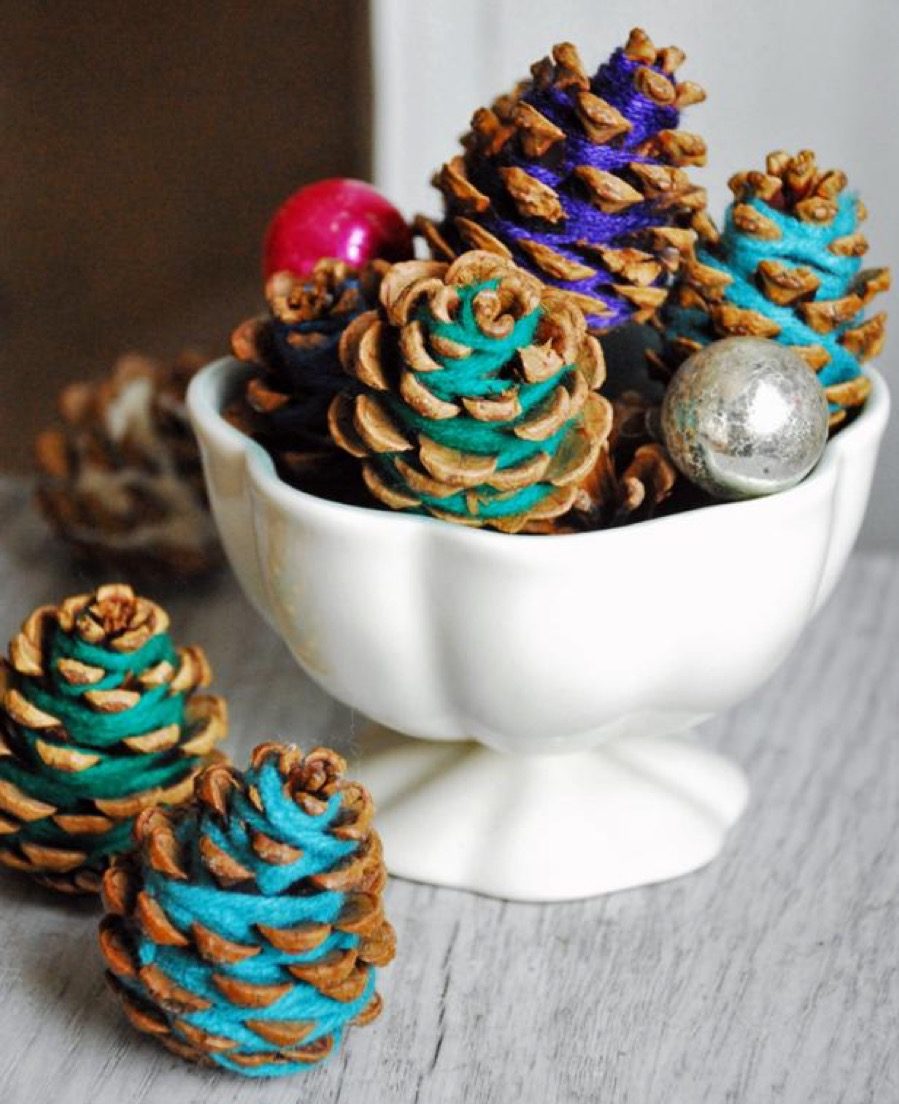
Using real pinecones (or those from a craft store if you truly can't find any in your backyard), wrap pieces of colorful yarn around the outside, securing each end with a dot of glue. This project is perfect for the last-minute decorators who want to add an extra touch of craftiness to their holiday soiree. To complete the ambiance, place the pinecones in a decorative bowl or simply place on a surface in need of some decor. And for more on the history behind your favorite decor trends (and perhaps also why they were never meant to be), check out The Worst Home Decorating Trend the Year You Were Born.
To discover more amazing secrets about living your best life, click here to follow us on Instagram!